QRZ.com real-time log synchronization
- EasyLog handles real-time synchronization of QSOs to QRZ.com.
- WARNING. QRZ.com requires a subscription to provide this service.
Sending QSOs from EasyLog to qrz.com
Starting with release 2025.1.1.2 EasyLog allows QSOs to be sent to QRZ.com in real time.
To enable synchronization to QRZ.com, you must have an active subscription (for QRZ.com) and then configure EasyLog.
WARNING!
QRZ.com requires a subscription in order to use the Log synchronisation service.
EasyLog has no affiliation with QRZ.com please contact them directly for any further information.
Obtaining the API Key
EasyLog configuration requires an API Key (a string of characters and numbers generated by QRZ.com for logging).
The API Key can be retrieved from the QRZ.com website.
Then log on to QRZ.com using your credentials and click on the following link:
https://www.qrz.com/docs/logbook30/api
Once you have the API Key, click on the QRZ.com menu in EasyLog, then click on the configuration button.
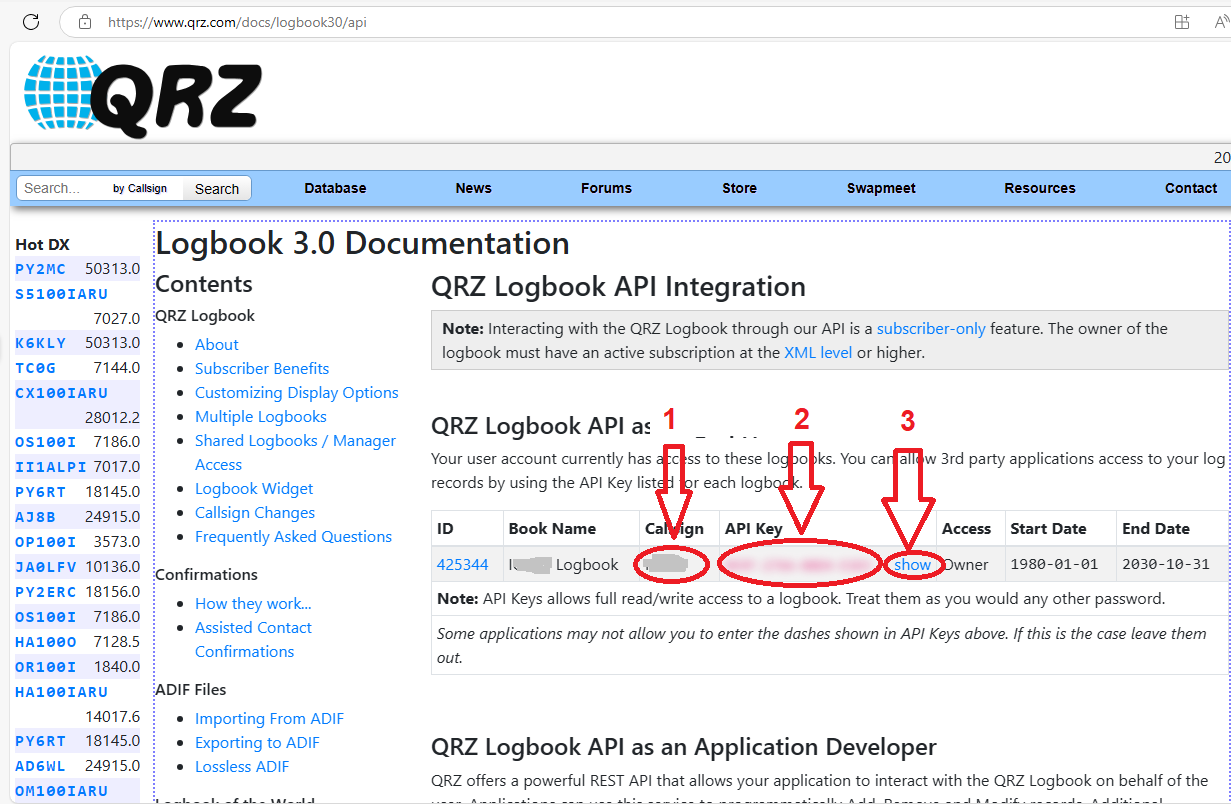
How to set the API Key
The API Key string is displayed by clicking on the "Show" item (step 3).
The callsign shown in step 1 is the callsign associated with the QRZ Log. This callsign should be set in the EasyLog setting window, see “EasyLog Configuration.”
The API Key will have to be entered in the setting window in EasyLog.
EasyLog Configuration
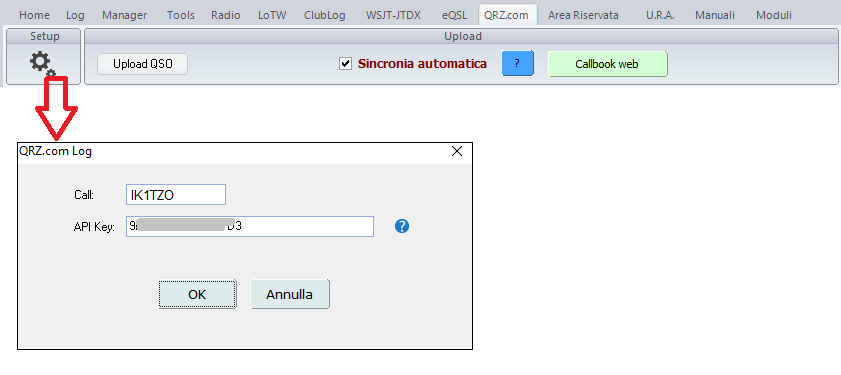
In EasyLog there is a new menu (QRZ.com), select it and press the Setup button to configure EasyLog's access to the QRZ.com Log
In the window shown above, in the Call field, the callsign registered on QRZ.com should be entered and in the API Key field, the character string that QRZ.com automatically assigns to the Log.
Press the OK key to save the setting data.
Select the “Automatic Sync” checkbox to send the new QSO entered in EasyLog, to QRZ.com in real time.
To test that everything is working properly, select a QSO from the EasyLog Log and press the “Upload QSO” button in the menu, or the “Send QSO to QRZ.com log” option
ADIF Log Export from EasyLog (one time only)
If you have never uploaded your Log to QRZ.com you need to do it at least once.
Use our “ADIF Converter” application to create the ADIF file corresponding to the Log managed by EasyLog.
After this operation, and after you have configured EasyLog to synchronize new QSOs, each time you enter a new QSO EasyLog will send the essential data to QRZ.com to be displayed in the internal QRZ.com log
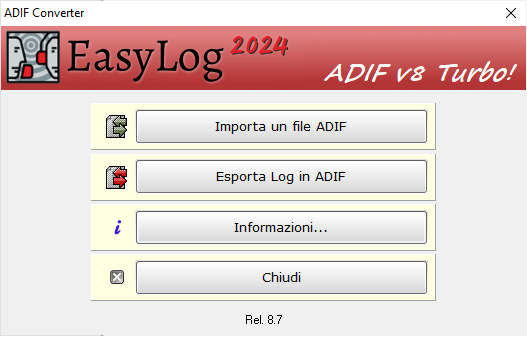
How to export EasyLog Log to ADIF format
Use the ADIF Converter application found in the EasyLog modules menu or in the installation icon group.
- Click on the Export Log to ADIF button.
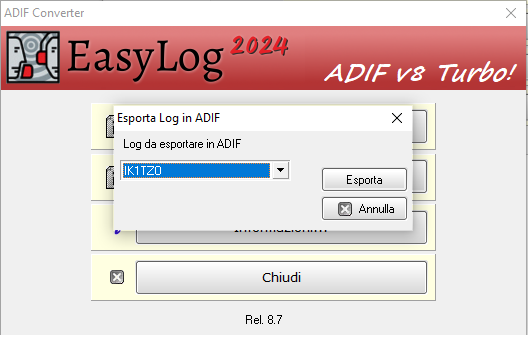
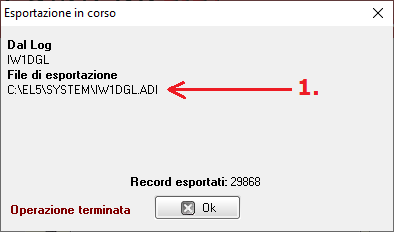
The window for choosing the Log to export will appear. Select the Log from the drop-down list (in the example, the Log to be exported is IK1TZO)
Then press the Export button. When finished, the ADIF file will be generated
You will find the exported adif file in the EL5SYSTEM folder of EasyLog (see 1.)
Importing an ADIF file in QRZ.com
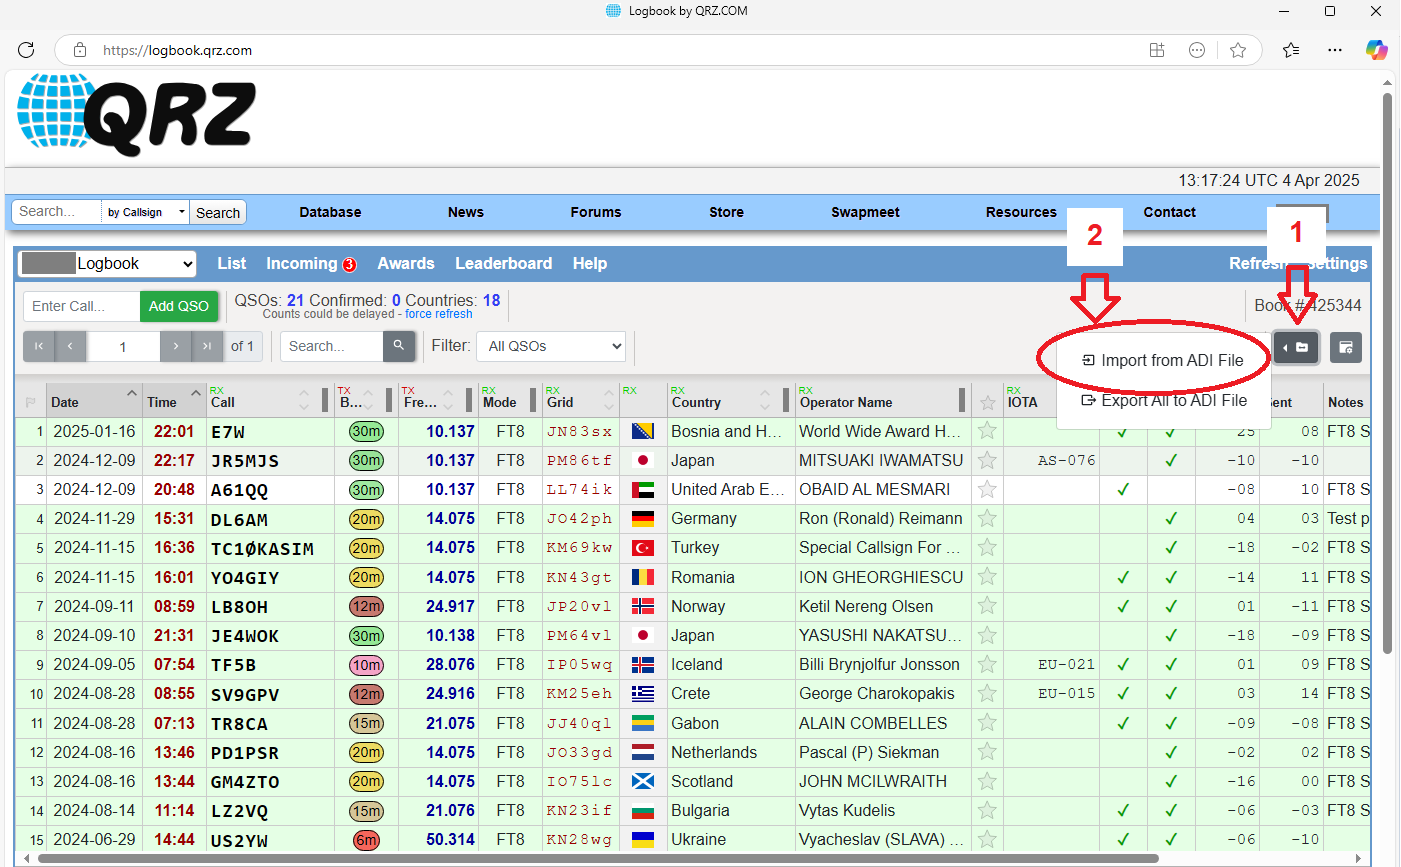
From the main page of the QRZ log, press the button (step 1). A menu will appear on the left, then select the option “Import from ADIF file,” (step 2).
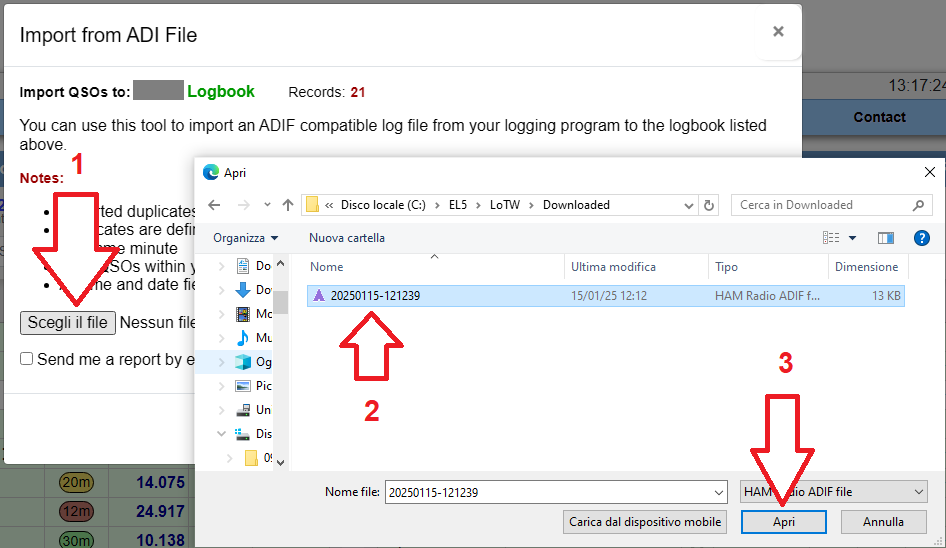
After selecting Import from ADIF file from the menu, the ADIF file selection window will appear. Then click the Choose File button (1.) , and from the new window, navigate until you find the ADIF file to be imported.
Then select the file (step 2), and press the Open button (step 3).
Then proceed as per the prompts shown on the page.
When finished, the QSOs imported with the ADIF file will be displayed.
Manual sending of a QSO to QRZ.com
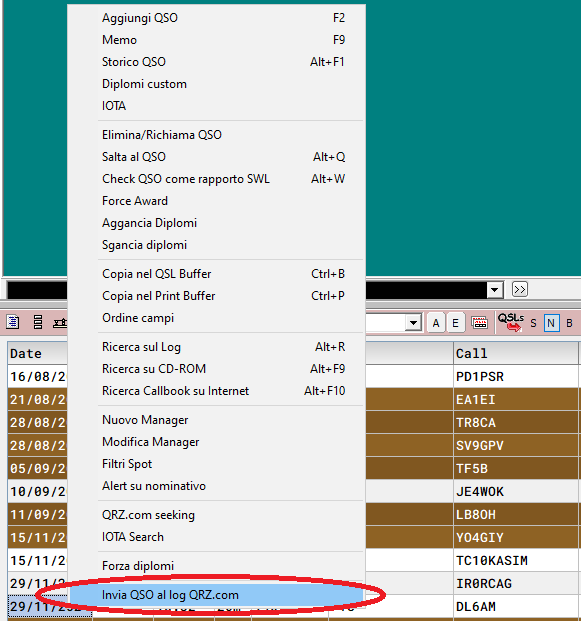
Manually sending a QSO to QRZ.com
Right-click, on the QSO to be sent to QRZ.com and select Send QSO to QRZ.com log
Authomatic syncronization of EasyLog QSOs to QRZ.com Log
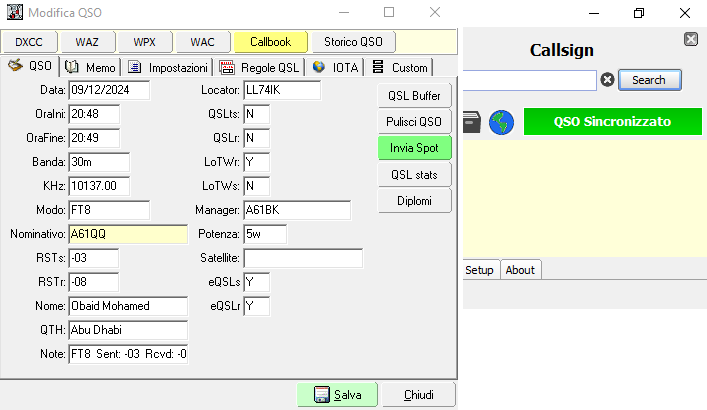
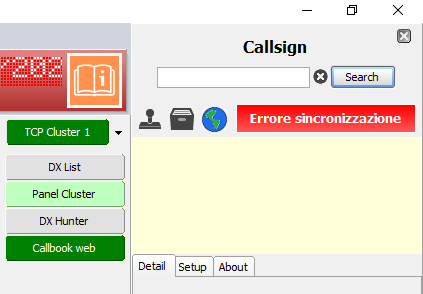
While saving the QSO, a little panel appears in the Callbook section (right in the main window of EasyLog), indicating the synchronization status.
The green little panel indicates that the QSO was synchronized correctly.
The red little panel indicates a synchronization error, clicking on the little panel will show the reason.
In case of synchronization error, click the red panel to get the detail of the cause of the problem
Settings for synchronization
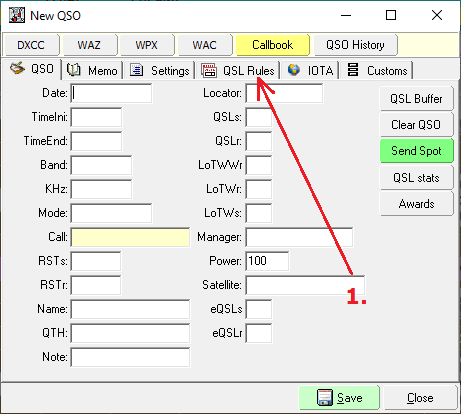
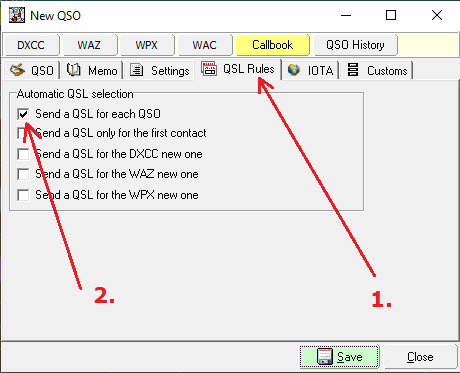
First select "QSL Rules" from the Add/Edit QSO
Then check the "Send a QSL for each QSO" control.
Each time a new QSO is saved, it will be syncronized wit QRZ.com database.
